QTP 11 checkpoint testing on Windows 7
Our test application :
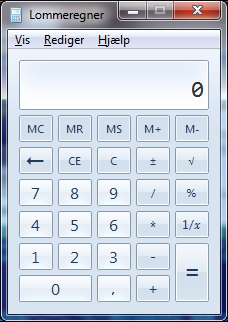
Again, the test application will be tested for its ability to multiply
two numbers.
IMPORTANT : before proceeding with this test, you
as assumed to have populated the repository with objects for the buttons
("9", "x", "3", "=") and numeric input field ("result"). For the sake of
intuitive understanding, the objects have been renamed here, and are used
in the VB script with their associated names.
Testing the calculator may actually be performed in two ways :
- either just checking the result by pressing appropriate buttons
- or interacting with input fields, injecting values into the numeric field
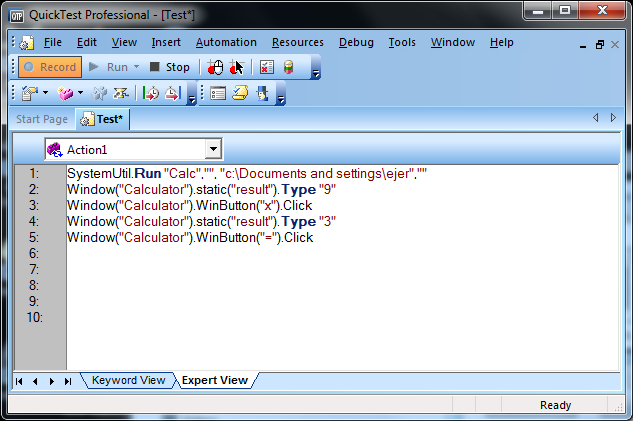
These ways are reflected in two types of VB scripts :
SystemUtil.Run "Calc","", "c:\Documents and settings\ejer",""
Window("Calculator").WinButton("9").Click
Window("Calculator").WinButton("x").Click
Window("Calculator").WinButton("3").Click
Window("Calculator").WinButton("=").Click
SystemUtil.Run "Calc","", "c:\Documents and settings\ejer",""
Window("Calculator").static("result").Type "9"
Window("Calculator").WinButton("x").Click
Window("Calculator").static("result").Type "3"
Window("Calculator").WinButton("=").Click
We will proceed with the latter script. Once calculation is completed,
it is necessary to check if the result presented in the calculator numeric field
is actually correct. This may be done using QTP
'checkpoints'. Usage of QTP checkpoints will be explored in this text.
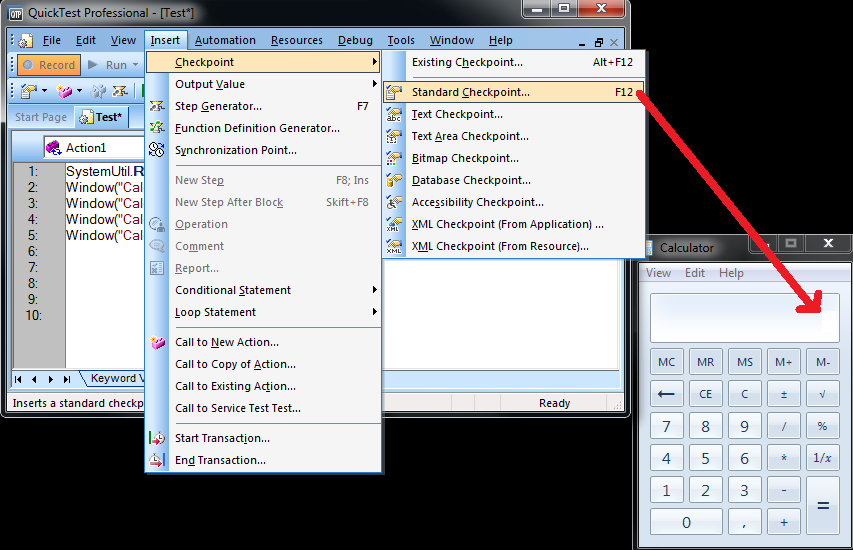
Proceed to resume recording (pressing the record button) and from the menu,
select Checkpoint -> Standard Checkpoint... Subsequntly click on the
calculator numeric field to record where the checkpoint is supposed to check.
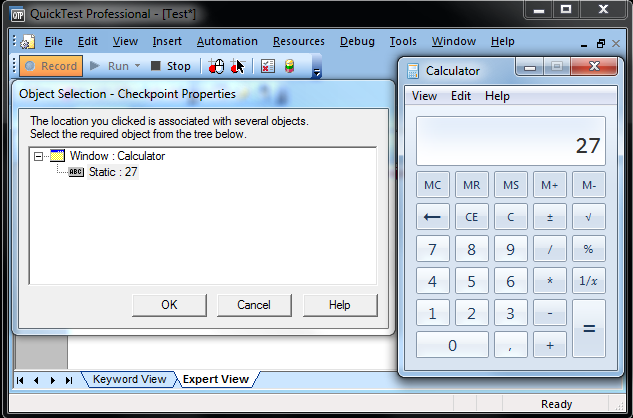
The checkpoint will receive a default name according to the content in the
selected checkpoint object. But this will be changed later on. Just proceed
to press OK for further specification of checkpoint details.
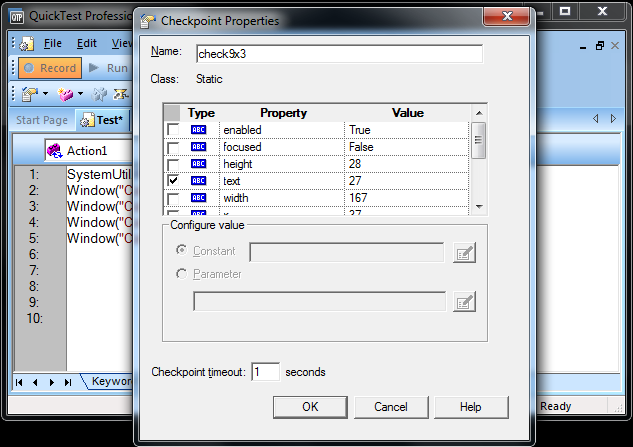
In the checkpoint details, click checkbox for "text 27" in order to check for
the result "27" every time the test is run. Since the calculator application
is rather fast performing its calculations, a "checkpoint timeout" of "1"
seconds may be specified (10 seconds are the default value).
After ensding the recording session, a line will have been added to the
VB script, performing the checkpoint test. The respective two types of
possible test sripting should now read :
SystemUtil.Run "Calc","", "c:\Documents and settings\ejer",""
Window("Calculator").WinButton("9").Click
Window("Calculator").WinButton("x").Click
Window("Calculator").WinButton("3").Click
Window("Calculator").WinButton("=").Click
Window("Calculator").Static("result").Check CheckPoint("check9x3")
SystemUtil.Run "Calc","", "c:\Documents and settings\ejer",""
Window("Calculator").static("result").Type "9"
Window("Calculator").WinButton("x").Click
Window("Calculator").static("result").Type "3"
Window("Calculator").WinButton("=").Click
Window("Calculator").Static("result").Check CheckPoint("check9x3")
Performing checkpoint testing
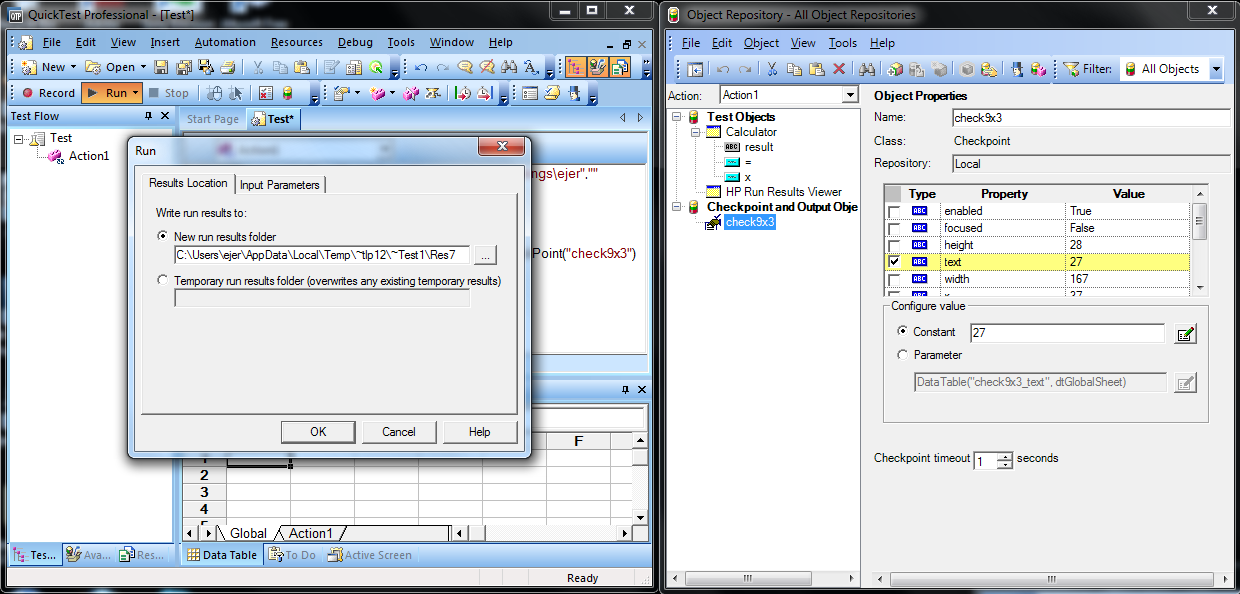
Actually performing the checkpoint test requires (once again) to start the
"Run" function in QTP. As outlined in the screenshots below, the test
will check if the specified numeric value of "27" actually shows up in the
calculator after having performed the recorded sequence of testing steps. If
so, the test will end successfull with status "Passed" in the HP Run Result
viewer.

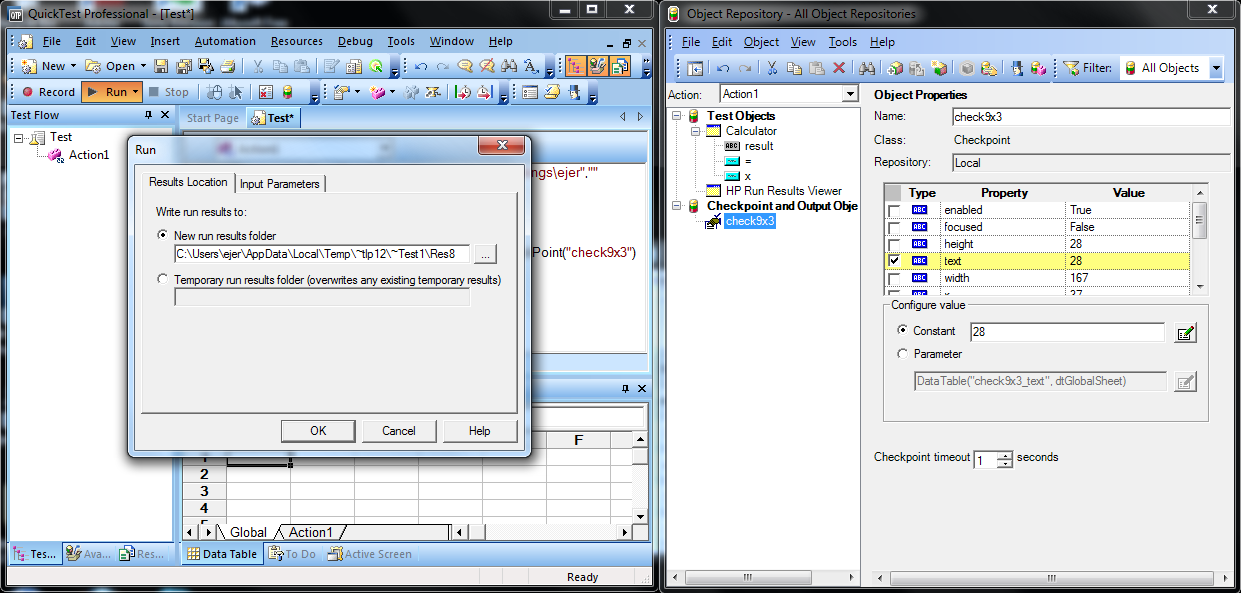
Simply changing the expected value at the checkpoint to fx. "28" in the
registry editor will illustrate the oppsite situation, where the tested
application does not perform as expected. In that situation the test will
end with status "Failed".

These tests illustrates how QTP automated tests may validate continued
functionality of an application. Simply changing the automated test result
values will allow test, if desired functionality is working as expected.